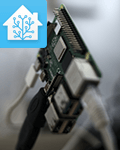
Home Assistant turns your Raspberry Pi into the ultimate home automation hub. With Home Assistant, you can focus on integrating your devices and writing automations. We will take you through the steps required to install Home Assistant.
Some advantages of using Home Assistant:
- Free and open source
- Optimized for embedded devices like Raspberry Pi
- 100% local home automation
Requirements
– Raspberry Pi (4 GB Model recommended)
– 32 GB Micro SD card (Must be class10)
– balenaEtcher( To write image to SD Card)
Step #1
Download the appropriate installation image option for your device:
- 32-bit -Raspberry Pi 3 Model B and B+ (32-bit is required for GPIO support)
- 64-bit – Raspberry Pi 3 Model B and B+
- Raspberry Pi 4 Model B (1 GB, 2 GB and 4 GB model) 32-bit (32-bit is required for GPIO support)
- Raspberry Pi 4 Model B (1 GB, 2 GB 4GB and 8 GB model) 64-bit (64-bit is required for 8 GB model)
- Non recommended hardware:
Step #2
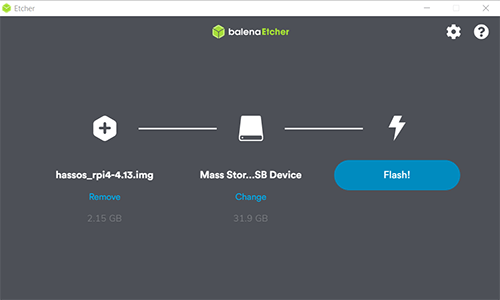
Flash the downloaded image to an SD card using balenaEtcher. We recommend at least a 32 GB SD card to avoid running out of space.
Step #3
Set up a static IP address and/or Wi-Fi Network. This will allow the IP of Home Assistant not to change. Do this on the Home Assistant SD card’s first, bootable partition (labeled “hassos-boot”, It might not be auto mounted in Linux) then create a new file called my-network in the CONFIG/network/ folder. Choose a Static IP on your Network Subnet.
For the content of this file, follow the Home Assistant Operating System howto.
However, my preferred method is to setup DHCP reservation on your router. As this can very from router to router. Please consult your router’s manual on setting up DHCP Reservations.
Step #4
Firstly, Insert the SD card into the Raspberry Pi. Secondly, Turn on your Pi. On first boot, it downloads the latest version of Home Assistant which takes around 20 minutes (slower/faster depending on the platform and your Internet connection).
Note: You should be able to find the IP address of your Pi from the admin interface of your router to apply DHCP Reservation to the Pi.
Step #5
You will be able to reach your installation at http://homeassistant.local:8123. If your router supports mDNS, otherwise use the Static IP chosen in step #4.
Step #6
Finally, Follow the wizard process which takes care of the initial setup for Home Assistant, such as setting up your Admin account, naming your home and selecting your location. At this point Home Assistant is installed and ready to start adding your devices.
That concludes the steps to install Home Assistant. Moreover, You are now ready to endure your start to a DIY Smart Home.

